A non-commercial guide to organic gardening in the mid-Atlantic states, with some specifics to central Virginia..and some information applicable across the country! Or to other time zones! Across the seas! Who knew? "No occupation is so delightful to me as the culture of the earth, and no culture comparable to that of the garden." Thomas Jefferson
Central Virginia Organic Gardener
Friday, August 21, 2020
Roasted Tomato and Eggplant Sauce YUM!
Sunday, February 2, 2014
Recipe: Spicy Baked Squash
Sunday, November 3, 2013
Recipe from the Garden: Quick Sauteed Veggies with Italian Seasoning and Cous Cous
1 cup cous cous
2 cups water
Bring water to a boil, add cous cous, cover and turn off the burner. Ready in 15-20 minutes, reserve for the dish.
A few T olive oil.
1 onion, diced
1 red or yellow bell pepper, diced.
2 cloves garlic, diced or pressed.
1 t each dried marjoram, basil, oregano.
Some sort of greens, chopped, about 1 cup or to your liking: kale, turnip or mustard, chard, spinach.
1 c. broccoli florets
Optional: mushrooms (see special instructions below) and other vegetables, like asparagus chopped, fennel, green beans, zucchini.
Optional: dried tomatoes, sliced olives, feta cheese.
Heat the oil in the pan and saute the onions and pepper with a pinch of salt until golden brown. If you are using mushrooms, I recommend sauteing them to a brown, caramelized stage, separately in another pan in olive oil and a pinch of salt to help them sweat. Add to sauteed onions when done. Add the garlic and herbs to the pan. Saute while stirring a few minutes more, add your diced or chopped additional vegetables and cous cous and stir. Cover with a lid and dry steam until the added vegetables are done. If too dry, add 1 or 2 tablespoons of water or stock before covering. Add in olives, dried tomatoes and feta at the end. Looks beautiful served on a platter!
Happy eating!
Sunday, September 15, 2013
A Recipe: Eggplant Sauce
SCORE! I finally fond something great to do with the bouty of eggplant I am experiencing: eggplant sauce! Like tomato-based pasta sauces, but easier to make! It is incredibly yummy and can be used on said pasta, is a great sauce for pizza or for aything that needs a kick-in-the-pants regarding flavor. And here is the recipe"
Ingredients
4-5T olive oil
4 to 6 slender (or a dozen of the super skinny) eggplant, or maybe 2 large eggplant, peeled and cut into chunks or thick slices.
2 onions, cut into wedges
6- 8 medium tomatoes, also cut into wedges
1 head of garlic (a full head, not just a clove)
1/4 cup fresh basil, chopped
1/4 cup grated parmesan cheese
salt to sprinkle (I like large grain salt) and to taste
1T lemon juice
Grated black pepper to taste
Preheat oven to 350 degrees. Cut the top off the garlic, place in tin foil, drizzle 1 t olive oil and a sprinkling of salt. Fully wrap the garlic head in the foil, and place it in the oven in a small baking pan or atop the cookie sheets (see next). Toss the veggies in a few T. of olive oil and 1/2 t salt. Spread these veggies one layer thick on cookie sheets that have been covered in baking parchment. Bake the veggies until soft; about 30 minutes.
Next. put the veggies (and all the juice they exude) into a food processor or blender. Include the garlic, after you squeeze each clove out of its "paper" wrapper. Add the basil, ground pepper, lemon juice and parmesan cheese. Pulse until pureed. Taste and add salt if desired. Enjoy!
Variations: you can roast a red pepper or two along with the veggies. The sauce can be frozen. You can add chopped raw tomatoes, dried tomatoes, avocado, green onions, chopped olives just before serving. Serve the sauce atop the fish or carbo (including pizza crust) of your choice!
Happy eating!
Sunday, September 16, 2012
Recipe: Tomato Corn Soup
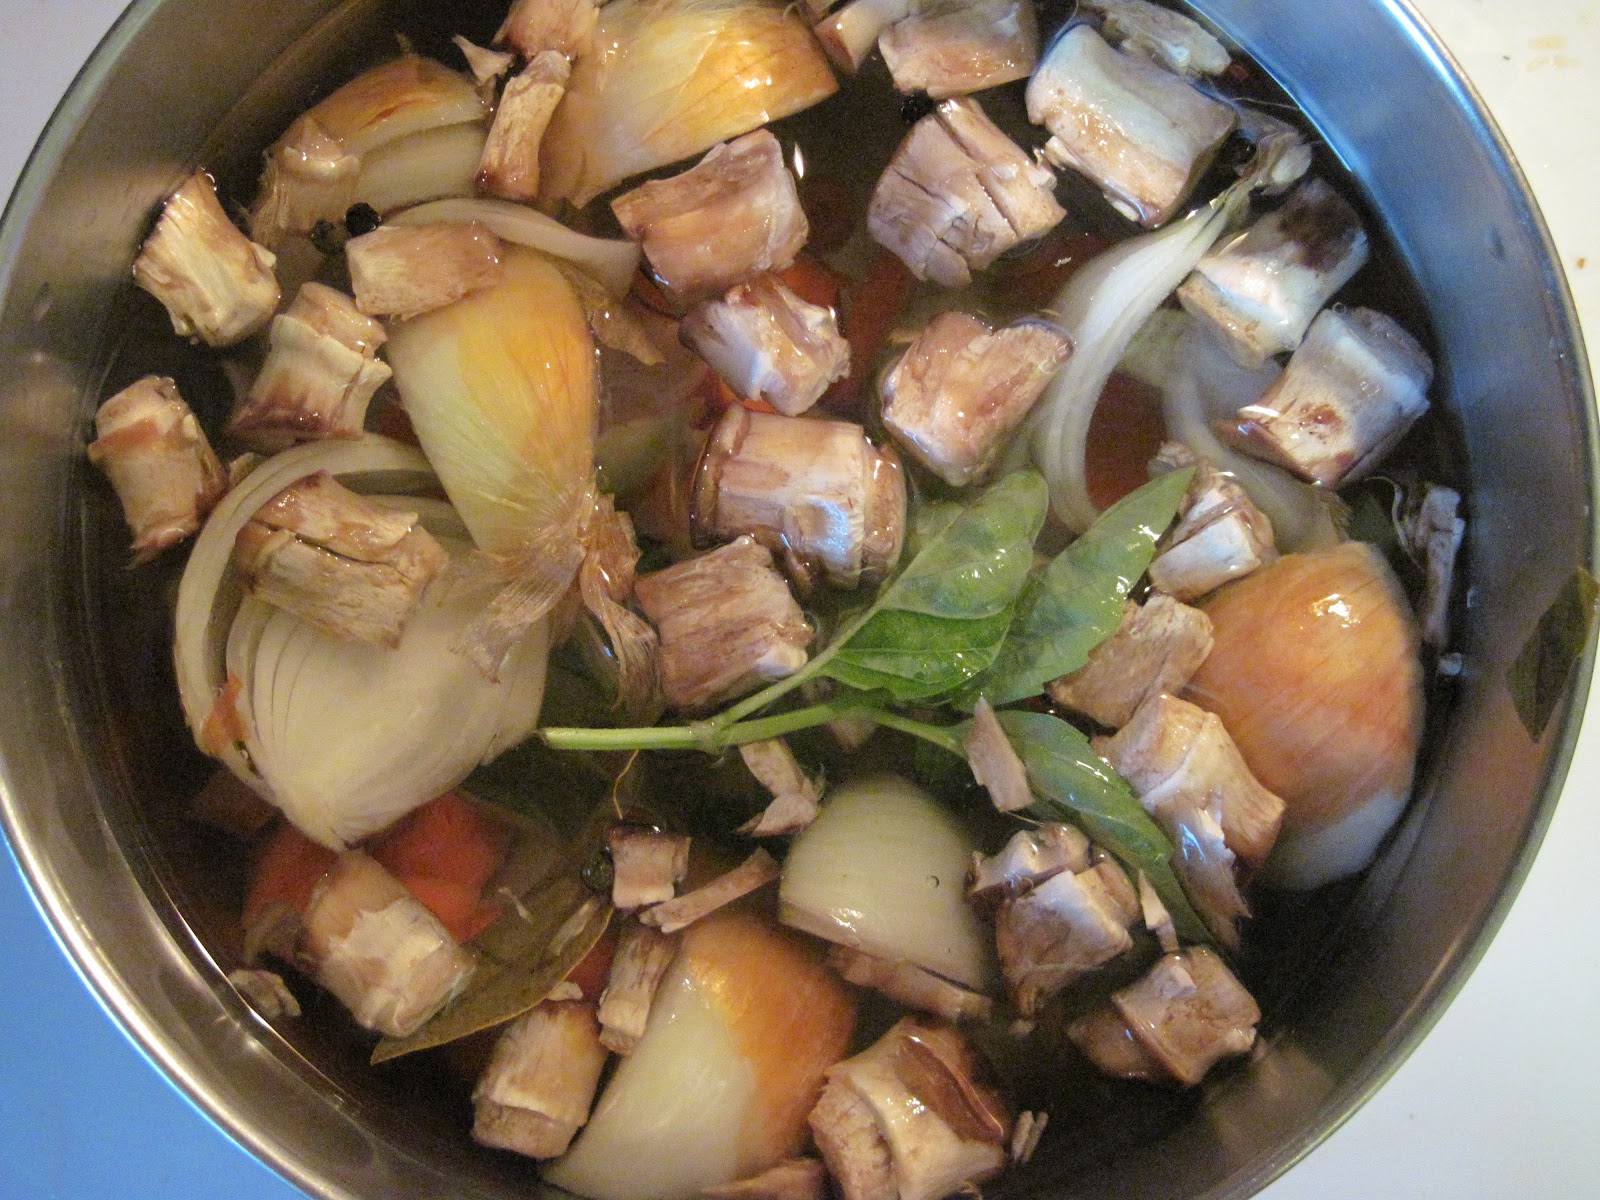
Above: vegetable stock before simmering
It is getting on to the end of fresh sweet corn season, so now is the time time for making soups that include corn. You can use frozen corn (and there is some decent frozen, sweet corn out there), but fresh is best. You can make this soup with water or stock. I am a vegetarian, so I make a stock of sweet corn cobs (all corn shaved off), onions, mushroom stems, carrots and whatever else I have to hand (parsley, basil, celery, zucchini ends- no brassicas or beets though, except for borscht). I simmer for about 45 minutes and keep it around all week or freeze it. Beef or chicken stock would be frankly richer, but I am happy with my veggie stocks (note: roasted or caramelized veggies make more deeply flavored stock).
So, here is what I do:
Ingredients
Make a quart the stock with odds and ends of veggies as above, or buy it.
2 T butter or olive oil
1 onion, diced
1 package baby 'bella or white button mushrooms.
1-2 cloves garlic, crushed
1 shredded or diced zucchini or other summer squash
3 shredded carrots
1 bay leaf
1 t marjoram
1 handful fresh basil, chopped
1 quart homemade tomato juice, or commercial tomato juice or V-8, thinned with 1 c water
2 c. stock
3 ears corn, freshly cut off the cob.
1 cup cous cous (white, whole grain, cooked according to package directions)
Cook and set aside the cous cous. Melt the butter in the pan or pans (see next sentence). Saute onions and mushrooms separately, either one after the other in the same pan or in two pans at the same time, with the crushed garlic. Please, let both cook separately, on medium heat for long enough so they caramelize and not steam (cooking together will crowd the pan and steam them so they will not develop a fill, deep, umami flavor and the mushrooms will be rubbery). I saute them for at least 15 minutes. Whey they are caramelized, combine them in one heavy-bottomed stock pot or Dutch oven, add herbs, and saute for 5 minutes. Add zucchini and carrots. Saute, stirring occasionally, for 20 minutes, until vegetables are softened. Add tomato juice/V-8 and stock. Bring to a light, bubbling boil. Test the vegetables. If they are almost done to your liking, add the corn, simmer and serve in 10 minutes.
Scoop a generous 1/2 cup of cous cous into the side of a bowl (can use rice, pasta, other grains or lentils instead). Ladle in the hot soup. Serve with bread !!!
(optional: you can change the seasoning family to more of a Tex-Mex taste with adding cumin, ground chilies and smoked paprika or chipotle powder to the sauteing onions, or a curry mix for Indian flavors).
Yum!
Happy fall eating! Get out and harvest those remaining veggies!
Wednesday, August 29, 2012
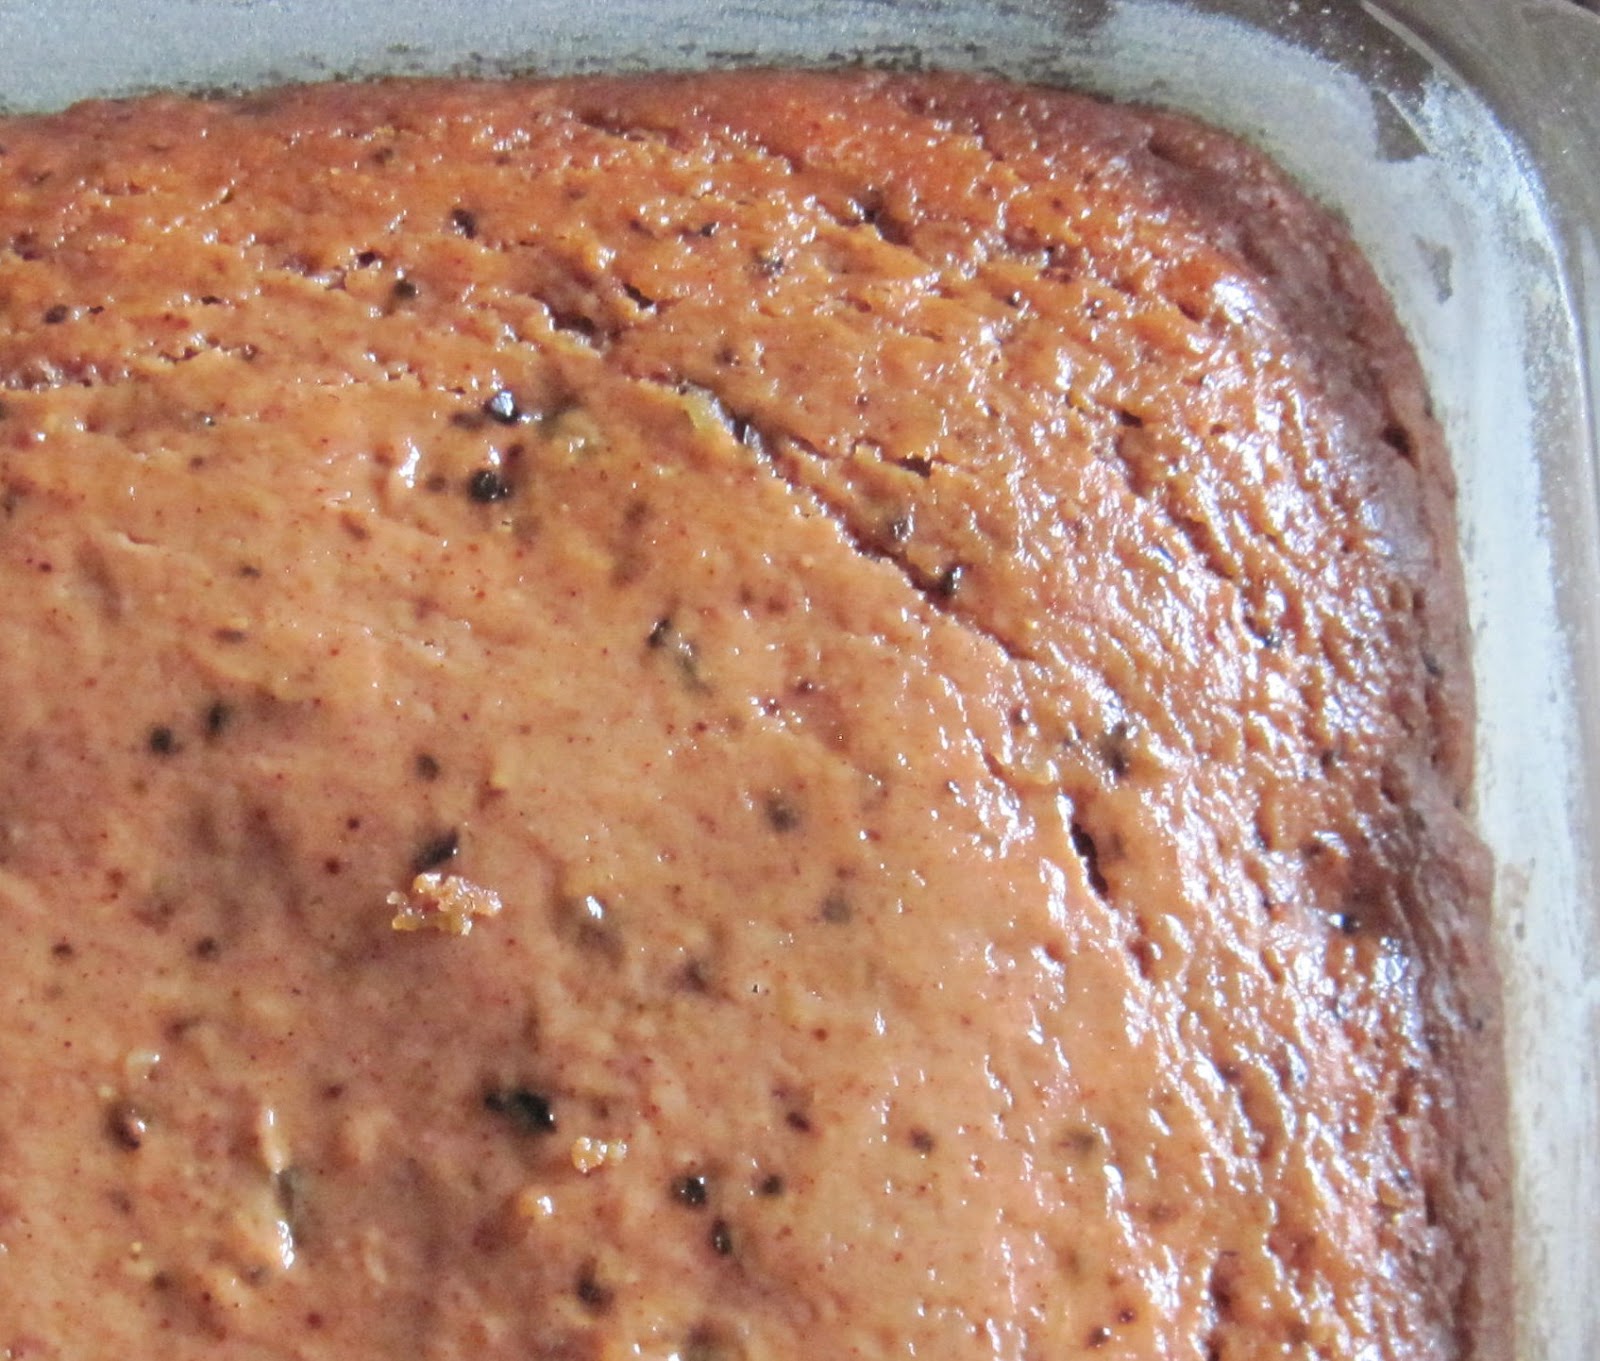
Wednesday Lagniappe*: Applesauce-Fig Cake: a recipe
(Couldn't even get a photo of the whole thing before the teen started devouring it!)
An abundance of home-grown apples and home-grown figs? Applesauce-Fig cake!
The apples on my tree mature in late summer, sort of early to my way of thinking, and I process much of it into applesauce. Here is a great recipe that was tested on members of my art class, all of whom have discerning palates!
Ingredients:
- 2 cups all-purpose flour, sifted before measuring
- 3/4 cup sugar
- 1 teaspoon salt
- 1 teaspoon cinnamon
- 1/2 teaspoon ground nutmeg
- 2 teaspoons baking soda
- 1 cup reconstituted dried figs. To reconstitute, soak in hot water 10 minutes and drain
- 1 cup chopped walnuts
- 1/4 cup melted butter
- 2 cups applesauce (I used unsweetened)
Sunday, August 19, 2012
Zucchini Fritters
OK, I have heard that many people complain about having too much zucchini and I have never experienced this. I, perhaps perversely, like zucchini and other summer squash and never get enough before the vine borers and mildew take down the plants. (I suspect that those people who complain about too much zucchini either plant too much or wait until the squash grows to the size of a baseball bat, but I digress). I make a lot of tomato-based soups, and zucchini, shredded or sauteed, is perfect to add for body and texture. I take whole, washed zucchini and shred them with the shredding (cole slaw) disk on my food processor and freeze it in 2 cup batches to use all winter, in soups, stews, quiches, zucchini bread and muffins.
Here is a favorite recipe, for those times where I want something fried and I want it now:
Zucchini (or other summer squash) fritters recipe BASE
2 cups shredded summer squash
1 onion, shredded
2 eggs beaten
1/4 cup milk
1//2 to 1 cup flour (depends on how wet the squash is- the goal is to make a batter that is not runny, but not dense either, use your judgment).
Salt and pepper to taste
Heat oven to 150 to 170 degrees. Put a paper-towel lined baking sheet into the oven. Mix zucchini and onion, add eggs and slowly add flour until thickened. Add salt and pepper. Heat a thick film of oil in a frying pan on the stove top (a high-heat canola works well, olive oil not so much). Test the pan by adding a bit of batter- if it sizzles, the pan is ready. Add tablespoon-size dollops of batter to the pan. Cook about 2 minutes on each side or until browned and move to the baking sheet in the oven to keep warm.
Now here is where the fun begins: VARIATIONS. I have added shredded carrot, golden beet, turnip and parsnip to the zucchini with delicious results. Want it it spicy? Add cumin, cilantro and dried chilies. Yum! Add fresh corn cut off the cob (use one ear) YUM YUM. Thin with buttermilk, add shredded cheddar or smoke Gouda. So this recipe is a base you can riff off of!
Happy gardening! And eating! Let me know if you have any experiments and how they worked out!
Sunday, July 15, 2012
Stuffed Greens: Recipe
Like some of my other "recipes," this is more a master recipe, rather than a measured approach (which gives you great flexibility). The basic idea is to start with washed greens that have a large leaf (chard works well, but so do collards with the stems trimmed back, steamed cabbage leaves or other green with a large leaf, like a mustard). Then, decide on a filling. If it's meat, you are on your own, but any meatball recipe or combo with sausage should work. You can also use rice, beans or lentils, seasoned with sauteed onion, garlic, peppers, and/or mushrooms and herbs, like Italian herb mixes. Add toasted nuts if you like. You can also fill with a ricotta cheese mix, like in a lasagna. Simply put a dab of the filling on the intact leaf (collards and cabbage will benefit from being steamed before), roll the leaf up and place it in a glass lasagna pan, continuing until the pan is full (see photo). I topped mine with spaghetti and al fredo sauces and baked for 45 minutes (or until bubbly) at 350 degrees. But I can imagine topping with salsa and cheddar, maybe having put a bit of corn in the filling. Serve over pasta if you like. Be creative!
Happy greens gardening and eating!
Sunday, July 1, 2012
An easy fruit dessert
If you have an ice cream maker, get it out, because sorbet is incredibly easy to make and delicious, if you follow a few simple rules. And if you have access to lots of fruit from your garden, it is a great way to use it up! First off, I use a standard ice and salt ice cream maker. I had the "fancy" kind where you froze the inner container, but ran into 2 problems: it didn't work well for sorbet and I rarely had that much room in my freezer for it. So, get a basic, $20 ice cream maker that uses salt and ice. The general idea is to make a smooth sorbet. I usually start with a simple syrup of 3 cups sugar and 3 cups water, stir together and heat till all sugar is dissolved.
Here is where you need to make some decisions. You want a smooth-ish fruit sorbet, though you can have some chunks if you like. The easiest is a citrus sorbet- just add 1 and 1/4 cups of lemon, lime, key lime or 2-3 cups of grapefruit juice to the syrup and follow manufacturers directions to freeze. As it is unlikely that many of you are growing citrus in VA, you need to use what you have. For peaches, peel, slice between 4 to 8 cups (to taste) and add them to the hot syrup, simmering for 10 minutes. Allow to cool, then puree in a blender. Put in the ice cream maker and follow directions. For fruit with small seeds (raspberries, strawberries) you can put them through a sieve- I just use a fine grained strainer atop a bowl and run my ladle n the bottom in a circular motion to extract the juice and pulp and leave the seeds. Or just leave the seeds in if you don't mind them. I do the same for muscadine grapes (here you must remove the seeds), but I like to then puree the skins with the pulp to get all that purple color and taste into the sorbet. You can also make apple or pear sorbet out of apple or pear sauce, though add 1-2 T of lemon juice for balance. How about variations? Nectarine or peach basil is nice, and you can also add lavender. Green tea can be made into a simple syrup and also adds a nice flavor. Watermelon or other melon sorbet is best if it is not cooked with the syrup, just pureed raw. One tip: put your storage containers into the freezer so they are nice and cold when the sorbet is ready,
Happy gardening! Happy eating the fruits of your labors!
Sunday, December 18, 2011
The Mustards
There are many greens that you can grow through the winter in Virginia: kale, chard, lettuces, and arugula to name a few, but none are as reliable as the mustards, in my humble opinion. Mustards, like the Green Wave and India Red Giant pictured here, reliably sprout, need little care, and can take freezing temperatures (though if freezing temps are to be prolonged, I do cover them with a row cover or cold frame). They are nutritional powerhouses which will easily self sow if you allow a few to flower and set seed. I like to do a simple treatment with mustard greens: young leaves can be eaten raw in salads and they can be simply sauteed or braised in olive oil, with onions, garlic (can you have too much garlic?), and a dash of red wine or balsamic vinegar. You can get creative and caramelize carrots, parsnips and or onions in the pan before adding the garlic and greens- this gives a sweet contrast to the earthiness of the greens. I have sauteed chopped mustard greens and used them to top pizza, baked potatoes and pasta- YUM!
Happy gardening!
Sunday, November 6, 2011
Harvest Recipe: Vegetarian (or not) Stuffed Pepper
I am going to be posting some recipes to help you use up that wonderful harvest of veggies you picked before the hard freeze. Today, it is vegetarian (or not) stuffed peppers. I grew a variety of bell peppers in pots this year and they did pretty well. My husband loves stuffed peppers, which are usually stuffed with browned meat or sausage and rice, with a tomato sauce topping. Here is how to make a good vegetarian version, though you can add the meat if you like.
Ingredients
4 red, yellow or green bell peppers, tops sliced off, stem removed (reserve tops) and remove seeds and membrane.
1.5 cups cooked rice- I used a mix of brown and wild rice, though white or leftover rice will do.
1 T. olive oil
1 onion, chopped.
2 cloves garlic, minced
1 stalk celery diced (optional)
5 or 6 button mushrooms chopped
1/2 t.each thyme, marjoram and celery seed (you can vary the spices- use Italian seasoning or curry power, chili powder-to taste instead- be creative!)
1/2 t garlic powder
salt
grating of black pepper to taste
1.4 cup ch0pped, toasted walnuts
1/4 cup dried apples chopped (you can use another dried fruit, raisins, apricots, but we dehydrate lots of apples from our tree for winter eating, so we use that)
2 cups taco sauce, salsa or tomato sauce (you can use less if you prefer it drier)(I use taco sauce because I like it and I make and can my own).
Saute the onions and garlic with a pinch of salt until caramelized, remove from the pan and do the same with the mushrooms and celery (putting then all in the pan at once steams them versus caramelizes them). When browned, add herbs and spices and cook a few more minutes. Mix these vegetables with rice, walnuts and apples. Stuff as much as you can in the 4 bell peppers and replace the reserved tops on them. Place the peppers in an 9 by 9 or so baking dish, adding any extra rice stuffing to the bottom of the pan. Pour the taco or other tomato-based sauce over them. Cover with lightly with foil and place in a 375 degree over for 40 minutes. Remove the foil and cook for 10 more minutes until bubbly.
There are many variations: add sauteed shredded carrots, sauteed leek, shredded parsnip, gree peas, corn to the rice stuffing. Top with cheese in the last 10 minutes to melt.
Happy eating!
Saturday, October 15, 2011
Muscadine Preserves
Muscadine grapes (Muscadinia rotundifolia) are native to the southeastern US and there are several cultivars, purple or greenish-bronze, available. You can grow this grape or pick it wild, if you know a source. My cultivated muscadine (purple Ison) is highly prolific and relatively care free, though you may have to beat it back regularly, as it is a vigorous grower! Muscadines are, unfortunately, not table grapes and are traditionally made into jelly, juice or sweet (cloying?) muscadine wine. I don't like grape jelly, so I make my muscadines into preserves. Take about 4 quarts, slash and squeeze out the seedy pulp, reserving the skins in one bowl and the pulp in another. Cook down the pulp about 10 minutes and strain to remove the large seeds, and return strained pulp to the pot. To this add the pureed skins (use a blender or food processor to puree them as small as you can get them) and bring to a boil. Add 2 T lemon juice, sugar to taste (I use about 4 cups) mixed with reduced sugar pectin-follow package directions and directions for canning. These are very grapey-tasting preserves, good atop cheese and in good ol' PB&J sandwiches! And the jam scents the whole house while cooking!Happy gardening and eating!
Sunday, September 18, 2011
Last eggplant harvest?

It is starting to feel like autumn around here, with lows in the 50's (and 40's!) and highs in the 60's. I went out yesterday and picked all the green tomatoes on the vines, save ones that were cracked or damaged. Why? Well, I have not had much luck with tomatoes ripening on the vine in September (maybe you have) and the plants are looking bad- tired, spent, diseased and it is time for them to go. I will ripen the tomatoes inside- they will never develop the transcendent taste of a tomato ripened on the vine and still warm from the sun, but they will do for cooking. I also make fried green tomatoes as a treat and use them in sandwiches and as topping 0n homemade pizza (really, it is very good). And here is my recipe:
Fried Green Tomatoes
2 or 3 green tomatoes, sliced 1/4 inch thick
1 egg, scrambled
1/2 cup cornmeal or so
1/2 t salt
good sized grating of black pepper
1/2 t garlic powder
2-3 t oil
Heat oil in skillet, until hot, not smoking. Mix cornmeal, salt, pepper and garlic powder and put on a plate. Dip each slice of tomato into egg, then in cornmeal mixture. Fry till golden each side, about 3-4 minutes a side (depending on pan heat-tomatoes should sizzle lightly when you add them to the pan). Remove and drain on a folded paper towel.
Fried green tomato pizza: top pizza crust with red/tomato sauce, shredded mozzarella (variation: cheddar) and fried green tomatoes. Bake as usual. YUM
But what does that have to do with the eggplant photo? This is today's harvest of eggplants, the last, except for many a few baby ones. I have been asked what can you do with eggplants to preserve them? There are eggplant spread and pickle recipes, but I think the easiest thing to do is to roast them for 40 minutes or until soft, in a 375 degree oven. Simply slice them in half, lay them cut side down on an oiled baking dish, brush with olive oil and sprinkle with salt. The resulting roasted flesh is scraped from the skins (though some just keep them intact) and frozen to use in baba ganooj or, my favorite Indian dish, bhaigan barta. You can also make a sauce of sauteed onions, garlic, herbs, tomatoes and roasted eggplant for pasta, pizza or rice. Another yum! Raw eggplant does not freeze well-you can dehydrate it raw to add to soups and stews, but I find the result less than satisfactory.
Listen to my podcast on "putting the summer garden to bed" on itunes or at: http://virginiaorganicgardener.podbean.com/
Happy gardening! And eating!
Sunday, January 30, 2011
'Shrooms

Indoor Mushrooms
I gave my sister-in-law an indoor Portabello mushroom kit for Christmas- she wanted it, but I was doubtful that it would do much. I had no experience with this product and thought she would need a dark, damp basement to make it work...and that it was a bit of a gimmick She got the kit. It was a box containing a fungusy, webby material (the "root" or "mother" of the fungal colony). Instructions were to wet down the contents, and to add some wetted soil-less mix that was included. She followed instructions and began misting it each day with tap water. By the way, she keeps it in her kitchen- no damp, dark basement needed. She got her first mushroom in about two weeks, and wondered if that was it, but 4 or 5 days later, more baby mushrooms budded up and, as you can see by the photo, she has quite a crop. As long as she keeps misting, the box should produce for many months to ?, until the spore is spent- then it will be time to compost the contents (and get a new kit from me!). It is possible to kill the mushroom "mother" by letting it dry out. Kits are not shipped in summer, so maybe overheating is a problem too. But so far, this seems to be a success!
Addenda: a recipe: Roasted Herbed Portabellos:
Take 4 Portabello mushrooms, wash and remove stems. Place gill side up in glass or ceramic roasting pan. Crush one clove of garlic into each cap and add a pinch of coarse salt. Mix 1/2c olive oil, 1/4 c balsamic vinegar (or red wine), 1 t sugar, 1/2 t salt and herbs to taste (basil, oregano, black pepper, I love marjoram). Pour over mushrooms and some onto the pan. Roast at 400 for 25 minutes, turn over and roast 10 minutes more. Good served atop mashed potatoes, on crusty bread, over rice or pasta. Can also roast with quartered onions and bell peppers in the same pan. (This is an overall nice marinade for veggies- chunked white or sweet potatoes, carrots, parsnips...)
Happy (indoor) gardening!
Sunday, January 9, 2011
Meyer Lemons
I had written an earlier post about hand pollinating my Meyer lemon plant last winter (taking pollen from one flower to others on a fine paintbrush) and getting two lemons. (The other day I hand pollinated about 10 blooms- we'll see what I get this year, though the plant had a bit of an bad adjustment to lower light conditions indoors this year).). This was very easy, and the lemon plant summered outdoors and the lemons grew very plump and fragrant. They are pictured above with the sliced lemons for a Shaker lemon pie that I made at Thanksgiving. Here's the recipe:
2-3 large lemons, organic Meyer or other
2 c sugar
3 eggs
1 pie crust
Slice lemons, rind and all, very thin (the Shakers valued all parts of the then rare and expensive lemons). Mix with the sugar and allow to soak, in fridge, overnight. In the morning, blind bake a pie crust till golden and allow to cool while you beat the eggs until light and add to the lemon mix. Pour filling into crust and bake in a 400 degree oven for 15 minutes, then reduce to to 350 degrees for 20-25 minutes until custard is set. This is delicious, tart and sweet treat!
Happy gardening and cooking!
Sunday, November 21, 2010
"Put Up" Soup: Tomato, Veg and Chick Pea Soup
Here is one simple soup you can make to use some veggies/produce you put up (in this case, four home grown items: canned tomatoes, frozen shredded zucchini, dried herbs and dry-stored onions).
Tomato and Chick-Pea Soup
1 large can (drained) or 2 cups home-cooked* chick peas, pureed in food processor or blender
1 t olive oil
1 t butter
1 large onion, finely diced
salt
1 t marjoram
1 T rubbed sage (dried sage that is rubbed between your fingers)
ground black pepper
1 qt tomato puree or stewed tomatoes, pureed.
1 c shredded yellow or green zucchini
vegetable or chicken stock, or broth.
Parmesan, to serve
Melt butter in olive oil in heavy pot. When warm, add onions and a pinch of salt. Saute until onions are caramelized and golden brown. Add dried herbs and pepper and saute another minute to release flavors. Add remaining ingredients and simmer for an hour, stirring occasionally. Serve with a topping of Parmesan cheese...and homemade bread, of course.
Additions/substitutions can include shredded carrots, potatoes, turnips, celery, celery seed, thyme, parsnips, peas (at the end), cooked pasta or rice....
* It is easy to home cook beans: soak beans overnight or while you are at work, drain. Place in a heavy Dutch over and add water to cover (add a bay leaf if you like). Bring to a boil and boil for 10 minutes. Turn off the heat, put a lid on it and winder back to it in a hour. They should be perfectly cooked.
Happy eating!
Saturday, August 28, 2010
Muscadines

Muscadines
In the fall I planted 2 "Ison" muscadine vines that I purchased at Edible Landscaping in Afton, VA. Muscadines, Vitus rotundifolia, are a native grape, adapted to the warm and humid conditions of the south. Unlike European wine or table grapes, they are not fussy and require far fewer winter chilling hours. Ison produces deep purple fruit: green-colored muscadines are called scuppernongs. It usually takes 3 years for most muscadines to go into full production, though I am getting a small amount of fruit this year. Muscadines are a vigorous vine, and they need occasional pruning and trellising-mine are growing (and beautifying) a chain link fence. Like most native grapes, the flavor is described as "foxy"- it is unusual and some say it is an acquired taste (but I acquired it right away and I'm a Jersey girl!) and it is seeded. The fruit can be made into wine, juice, jelly and preserves, or you can simply leave them for the birds! I make a one-crust pie with them as follows:
Apple-Muscadine Pie
1 pie crust
2 pie apples, sliced
2 c. muscadines, sliced in half and seeded.
3/4 c sugar or to taste
2 T minute tapioca as a thickener (optional)
pat of butter
1 t lemon juice
Line pie pan with crust- you can "blind bake" it if you like (bake it empty at 350 for 20 mins). I like to roll my pie crust out to a square and lay each corner over the filling to make a pattern on the top of the pie (not necessary) (I call this a "handkerchief crust."). In a separate bowl mix apples slices, muscadines, sugar, tapioca and lemon juice and let it sit 15 mins. Preheat over to 350. Add to pie crust, fold corners over to partially cover the top, and put the pat of butter in the center. Bake at 350 for 40 min or until bubbling and crust is browned. Variation: add some cranberries in fall for a different and interesting taste!
Happy gardening ! And eating!
Saturday, July 31, 2010
Recipe: Veggie poached eggs
Recipe: Veggie Poached Eggs
Casting around for a breakfast idea that uses garden produce (and was not an omelet-omelets are not my best dish), I came up with this one- you an be flexible about amounts and types of veggies, as long as you include some tomatoes for sauce:
1 T olive oil
1 onion, diced.
3 cloves garlic, crushed
1 zucchini ,cubed
I red bell pepper, diced
1 jalapeno, seeded and diced
1-2 large tomatoes, chopped (can be canned, stewed)
10 large basil leaves, chopped
Sprig of Mexican oregano leaves, chopped
3 -4 eggs (from a local farmer if you can!)
salt and pepper to taste
In a shallow saute pan, saute onion and garlic in olive oil until caramelized. Add peppers and saute about 5 minutes. Add zucchini and saute another 5. Add rest of ingredients EXCEPT EGGS and put a lid on the pan, keep on medium heat and cook until zucchini is soft and tomatoes "saucy." Make small wells in the pan, one for each egg and crack an egg into each well. Put the lid back on and poach in the vegetable juices for 3-5 minutes, or less or more depending on how well you like your eggs poached (I like mine with ever-so-slightly firmed yolks). I served it with toast and soysage- YUM!
Other ideas- add cumin and cilantro, use eggplant, add corn scraped off the cob!
Happy garden eating!
(And Happy 28th anniversary to my beloved!)
Sunday, June 20, 2010
Chocolate and Zucchini Muffins
A solution to too much zucchini!Chocolate and Zucchini Muffins from the Christian Science Monitor:
2-1/2 C flour
1 t salt
1 t baking soda
1 t cinnamon
1/4 C unsweetened cocoa
1/2 C vegetable oil
2 eggs, lightly beaten
1 t vanilla extract
1/2 C buttermilk
1/2 C butter, softened
1-3/4 C sugar
2 C grated raw zucchini (or other summer squash)
1 C chopped nuts
3/4 C miniature semisweet chocolate chips
Preheat oven to 350 degrees and grease muffin tins (small ones?) generously with butter or line with paper muffin cups. Mix together flour, salt, baking soda, cinnamon and cocoa and set aside. In a medium bowl, stir together the oil, eggs, vanilla, and buttermilk. In a large bowl, with electric beater, blend the sugar and butter until well mixed. Add the oil mixture to this and blend well. Stir in zucchini, followed by the dry ingredient mix. Scoop the batter into the muffin tins. Sprinkle top with nuts and, if desired, with mini chips. Bake for 20 to 25 minutes or until the tops feel firm when gently pressed and a toothpick inserted in the center comes out clean. Makes about 2 dozen muffins depending on size.
Friday, June 18, 2010
Too much rhubarb?

Photo: Dieter Weber(GNU free documentation license)
Too much rhubarb? I envy you. For 20 recipes for rhubarb, go to:
http://www.huffingtonpost.com/2010/06/16/rhubarb-recipes-cooking-i_n_613509.html
like rhubarb tart, below:
Rhubarb Tart with Lemon Verbena
For the filling:
- 1 kilo (2 pounds 3 ounces) untrimmed rhubarb, to yield about 800 grams (1 pound 12 ounces) when trimmed
- 80 grams (1/3 cup plus 1 tablespoon) sugar (I use finely ground, blond raw sugar)
- 1 tablespoon uncooked small pearl tapioca (or semolina)
- about 12 leaves fresh lemon verbena
- 1 rounded tablespoon crème fraîche or heavy cream
- 1 large egg
For the dough:
- 200 grams (7 ounces, about 1 1/2 cups) pastry flour (in France, use a T45 or a T55)
- 80 grams (1/3 cup plus 1 tablespoon) sugar (I use finely ground, blond raw sugar)
- 25 grams (1/4 cup) almond powder (a.k.a. almond meal)
- 120 grams (8 1/2 tablespoons) cold butter, diced (I use semi-salted; if you use unsalted, add a good pinch of salt), plus a little for the pan
- 1 large egg, beaten
Makes one 28-cm (11-inch) tart (plus leftover tart dough).
1. Prepare the rhubarb
Start about 3 hours before baking. Trim the ends of the rhubarb stalks (no peeling necessary) and slice into 2-cm (3/4-inch) chunks. Place in a nonreactive shallow dish, sprinkle with half of the filling's sugar (40 grams or about 3 tablespoons) and toss to coat. Leave to macerate at room temperature so it will release some of its juices.
2. Make the dough
Start about 2 hours before baking. Combine the pastry flour, sugar, almond powder, and salt if using, in the bowl of a food processor or stand mixer. Add the diced cold butter and mix until the mixture takes the consistency of breacrumbs. Add the egg and mix just until the dough starts to come together. (This can also be done by hand, but try to handle the dough as little as you can and without heating the butter too much with your hands.)
Turn out on a clean work surface. Divide the dough into one 300-gram (10 1/2-ounce) piece and one 180-gram (6 1/3-ounce) piece, and pat each piece of dough into a disk without kneading. Wrap each piece in plastic wrap.
You'll be using the larger of the two pieces for this tart. Place that one in the fridge and chill for 1 hour. (The other piece can be reserved -- and optionally frozen -- for another use; it is big enough to line a 22-cm [8 2/3-inch] tart pan.)
3. Roll out the dough
Remove the dough from the fridge and let it rest for a few minutes at room temperature so it's not too cold, or it won't roll out well.
Butter a 28-cm (11-inch) tart pan, preferably one with a removable bottom.
Roll the dough out on a lightly floured surface and transfer it to the pan to line it, crimping the sides all around with your fingers for a prettier effect. Don't worry if it tears -- just press it back together or patch it up if necessary. Prick the bottom with a fork a few times, and return to the fridge to rest for 30 minutes (this will prevent the dough from shrinking or sliding down the sides of the pan).
4. Prepare the lemon verbena syrup
While the crust is chilling, place a medium colander over a bowl and pour the rhubarb and juices through the colander to drain thoroughly. Set the rhubarb chunks aside, and transfer the strained juices to a small saucepan over high heat. Bring to a boil and reduce until you have about 80 ml (1/4 cup) juices. Remove from the heat, add the lemon verbena leaves and let steep.
5. Blind-bake the crust
Preheat the oven to 170°C (340°F) and insert the pan in the oven to blind-bake (i.e. bake without the filling) for 10 minutes.
6. Add the rhubarb
Remove the pan from the oven. Sprinkle the tapioca evenly across the bottom (this will help absorb the rhubarb juices and keep the crust crisp) and arrange the chunks of rhubarb on top in a crowded but single layer. Return to the oven for 20 minutes.
7. Add the custard
While the crust and rhubarb are baking, sieve the reduced juices into a bowl to remove the lemon verbena leaves (or just fish them out). Add the remaining sugar from the filling ingredients (40 grams or about 3 tablespoons), the cream, and the egg, and beat to combine.
Remove the tart from the oven and turn the oven off. Pour the egg mixture evenly over the rhubarb and return to the turned-off but closed oven for another 20 to 30 minutes, for the residual heat to gently set the custard.
8. Cool
Transfer to a rack and let cool completely before serving.